

About two weeks ago, I finished building my Holybro X500 V2 drone. Even though I had done thorough research before buying the parts, the build itself was much more challenging than I expected. Several unexpected issues came up along the way, and there weren’t many resources covering the specific problems I ran into. That meant I had to troubleshoot and figure out most of them on my own. Here are some of the biggest challenges I encountered and how I solved them.
1. The Wrong Power Module
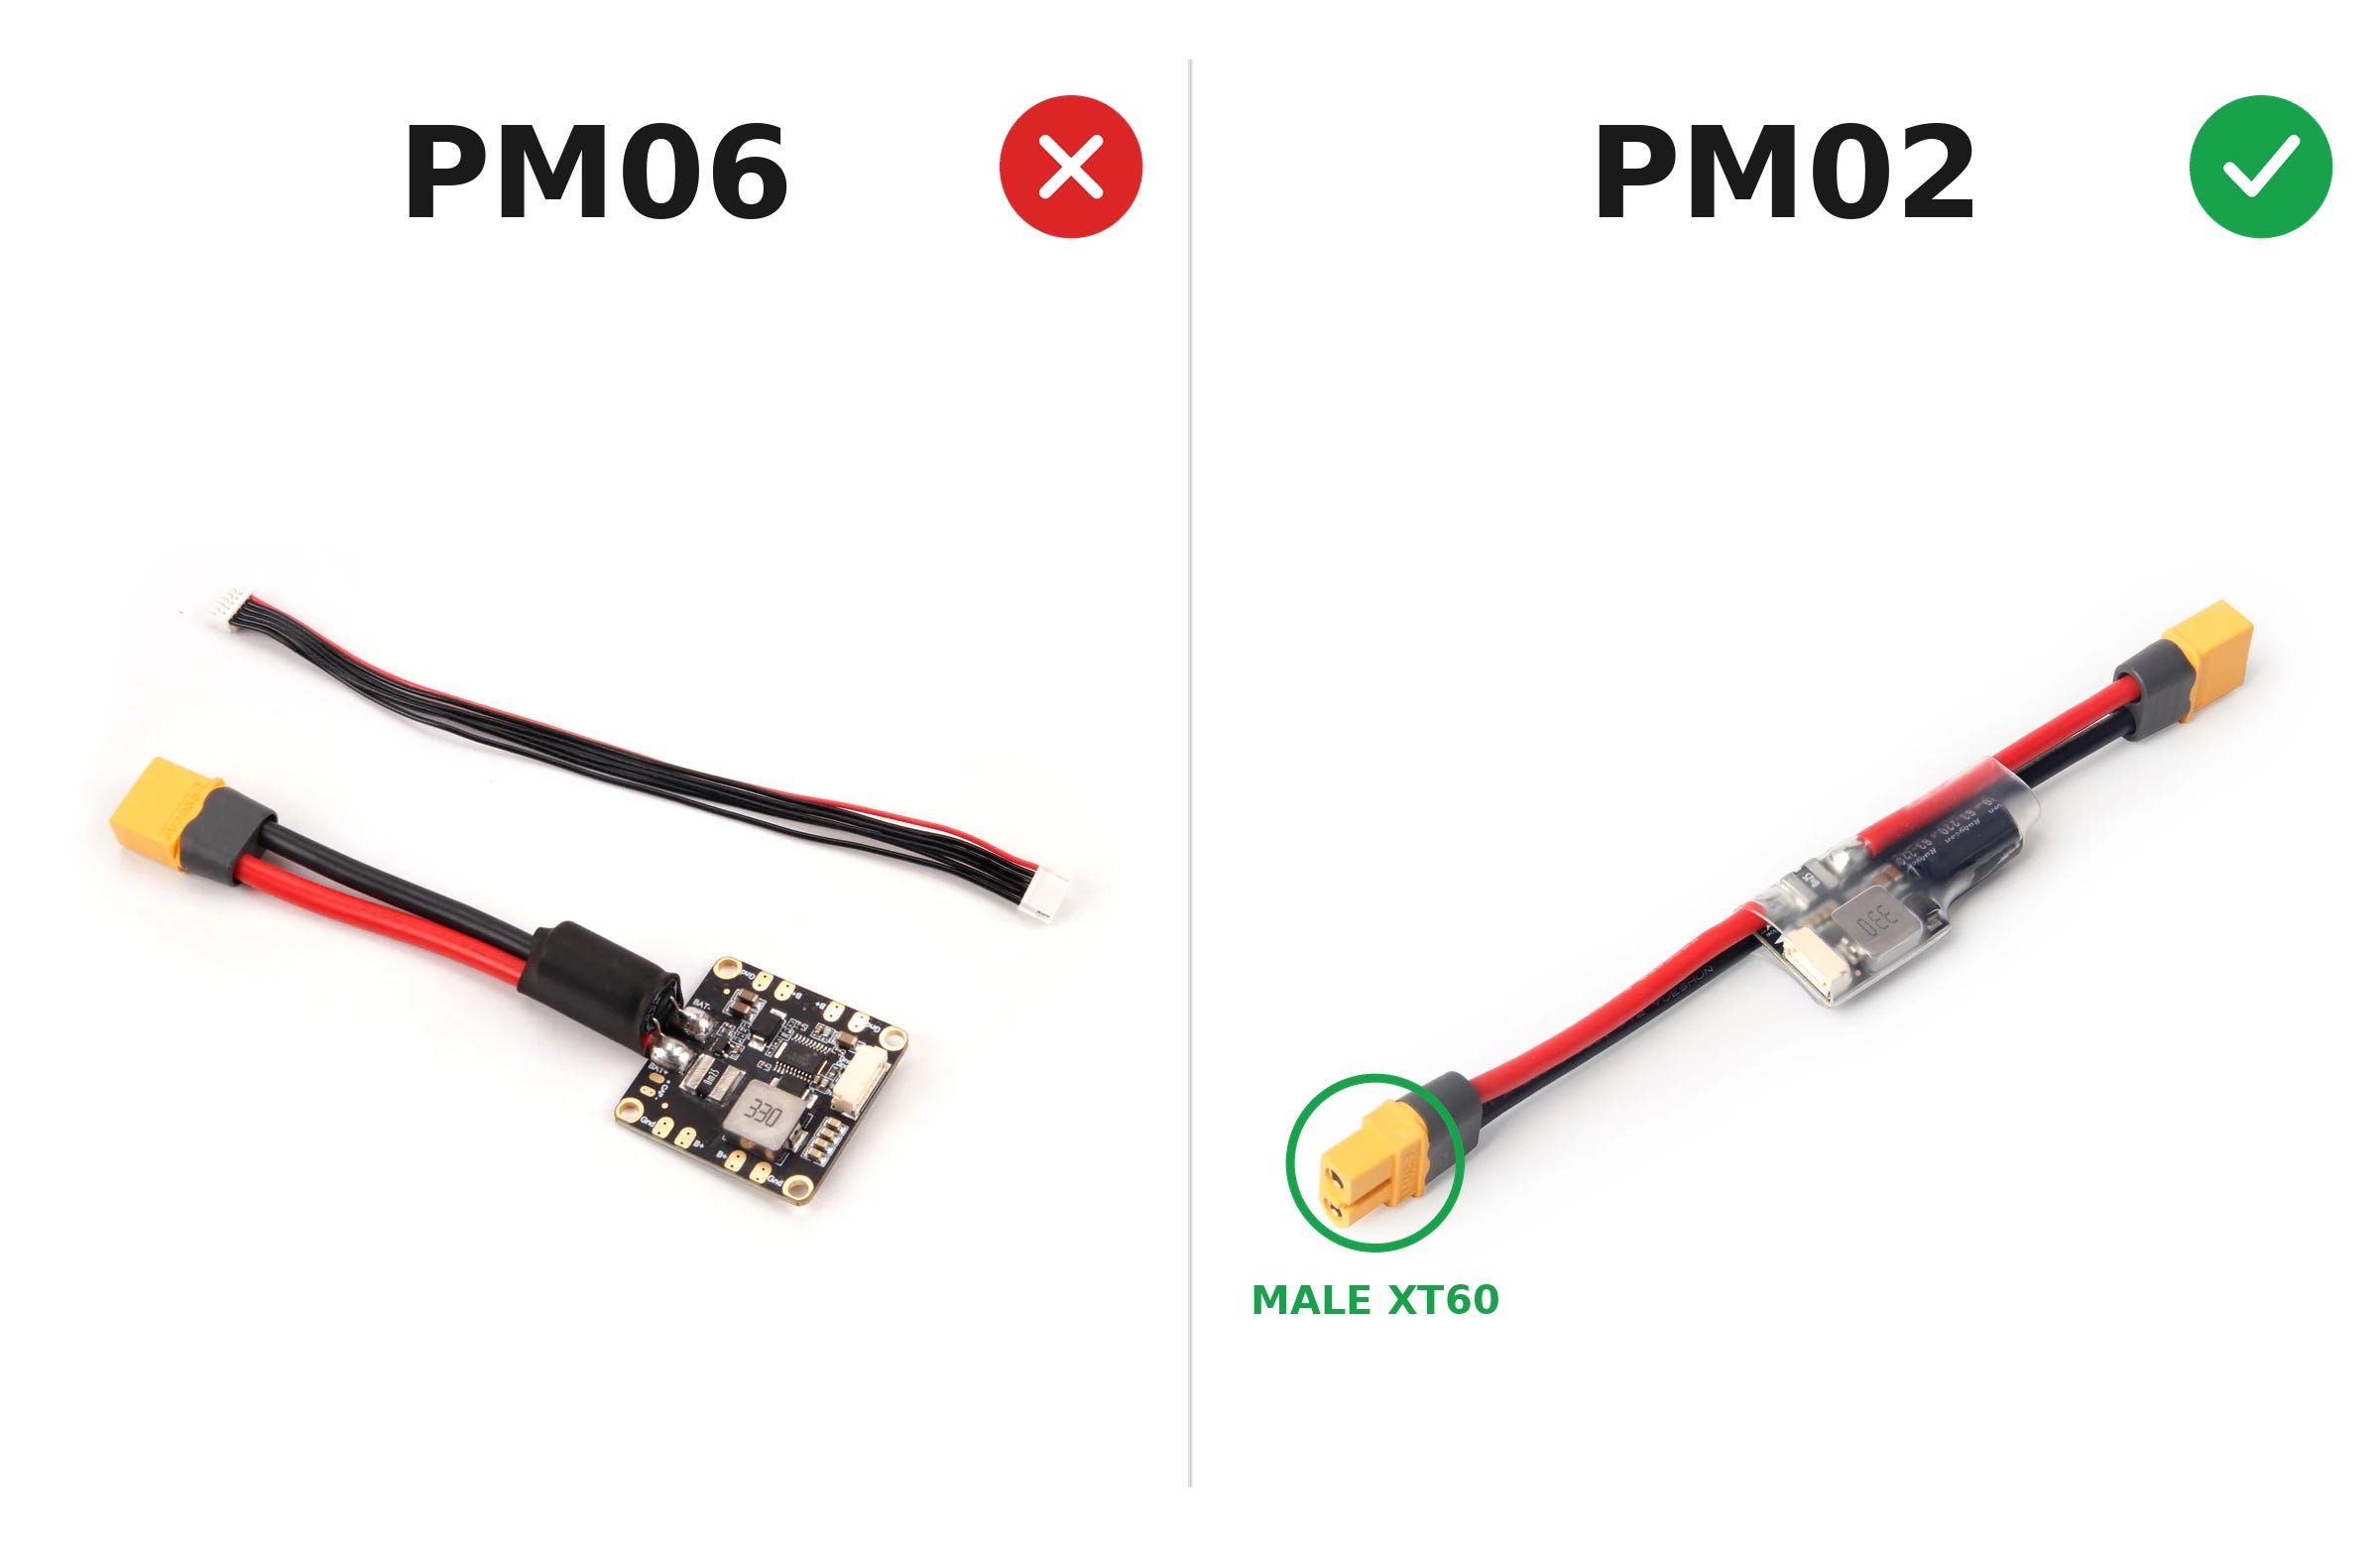
The first issue came before I could even power the drone. I had purchased my power module in a bundle with the Pixhawk 6C flight controller and GPS, assuming everything would be compatible. However, when I started wiring everything together, I realized the included power module only had one female XT60 port and a JST-GH connector. It was missing the male XT60 output needed to connect to the power distribution board, making it impossible to wire the system correctly.
To solve this, I purchased the Pixhawk PM02 V3 12S Power Module separately. Unlike the bundled version, it included the necessary battery, power distribution board, and flight controller connections, allowing me to continue with the build.
2. Only Two Motors Would Spin
Once I had power flowing to both the flight controller and the motors, I connected the Pixhawk to QGroundControl to verify the motor configuration. QGroundControl also allowed me to spin up each motor individually, but I quickly noticed that only two of the four motors responded.
At first, I assumed two of the motors or ESCs were defective. After inspecting the PWM module more closely, I noticed that two of the ESC connectors had their wire colors facing the opposite direction from the other two. I flipped those two connectors around, plugged them back in, and all four motors immediately started working.
3. Choosing the Wrong Receiver
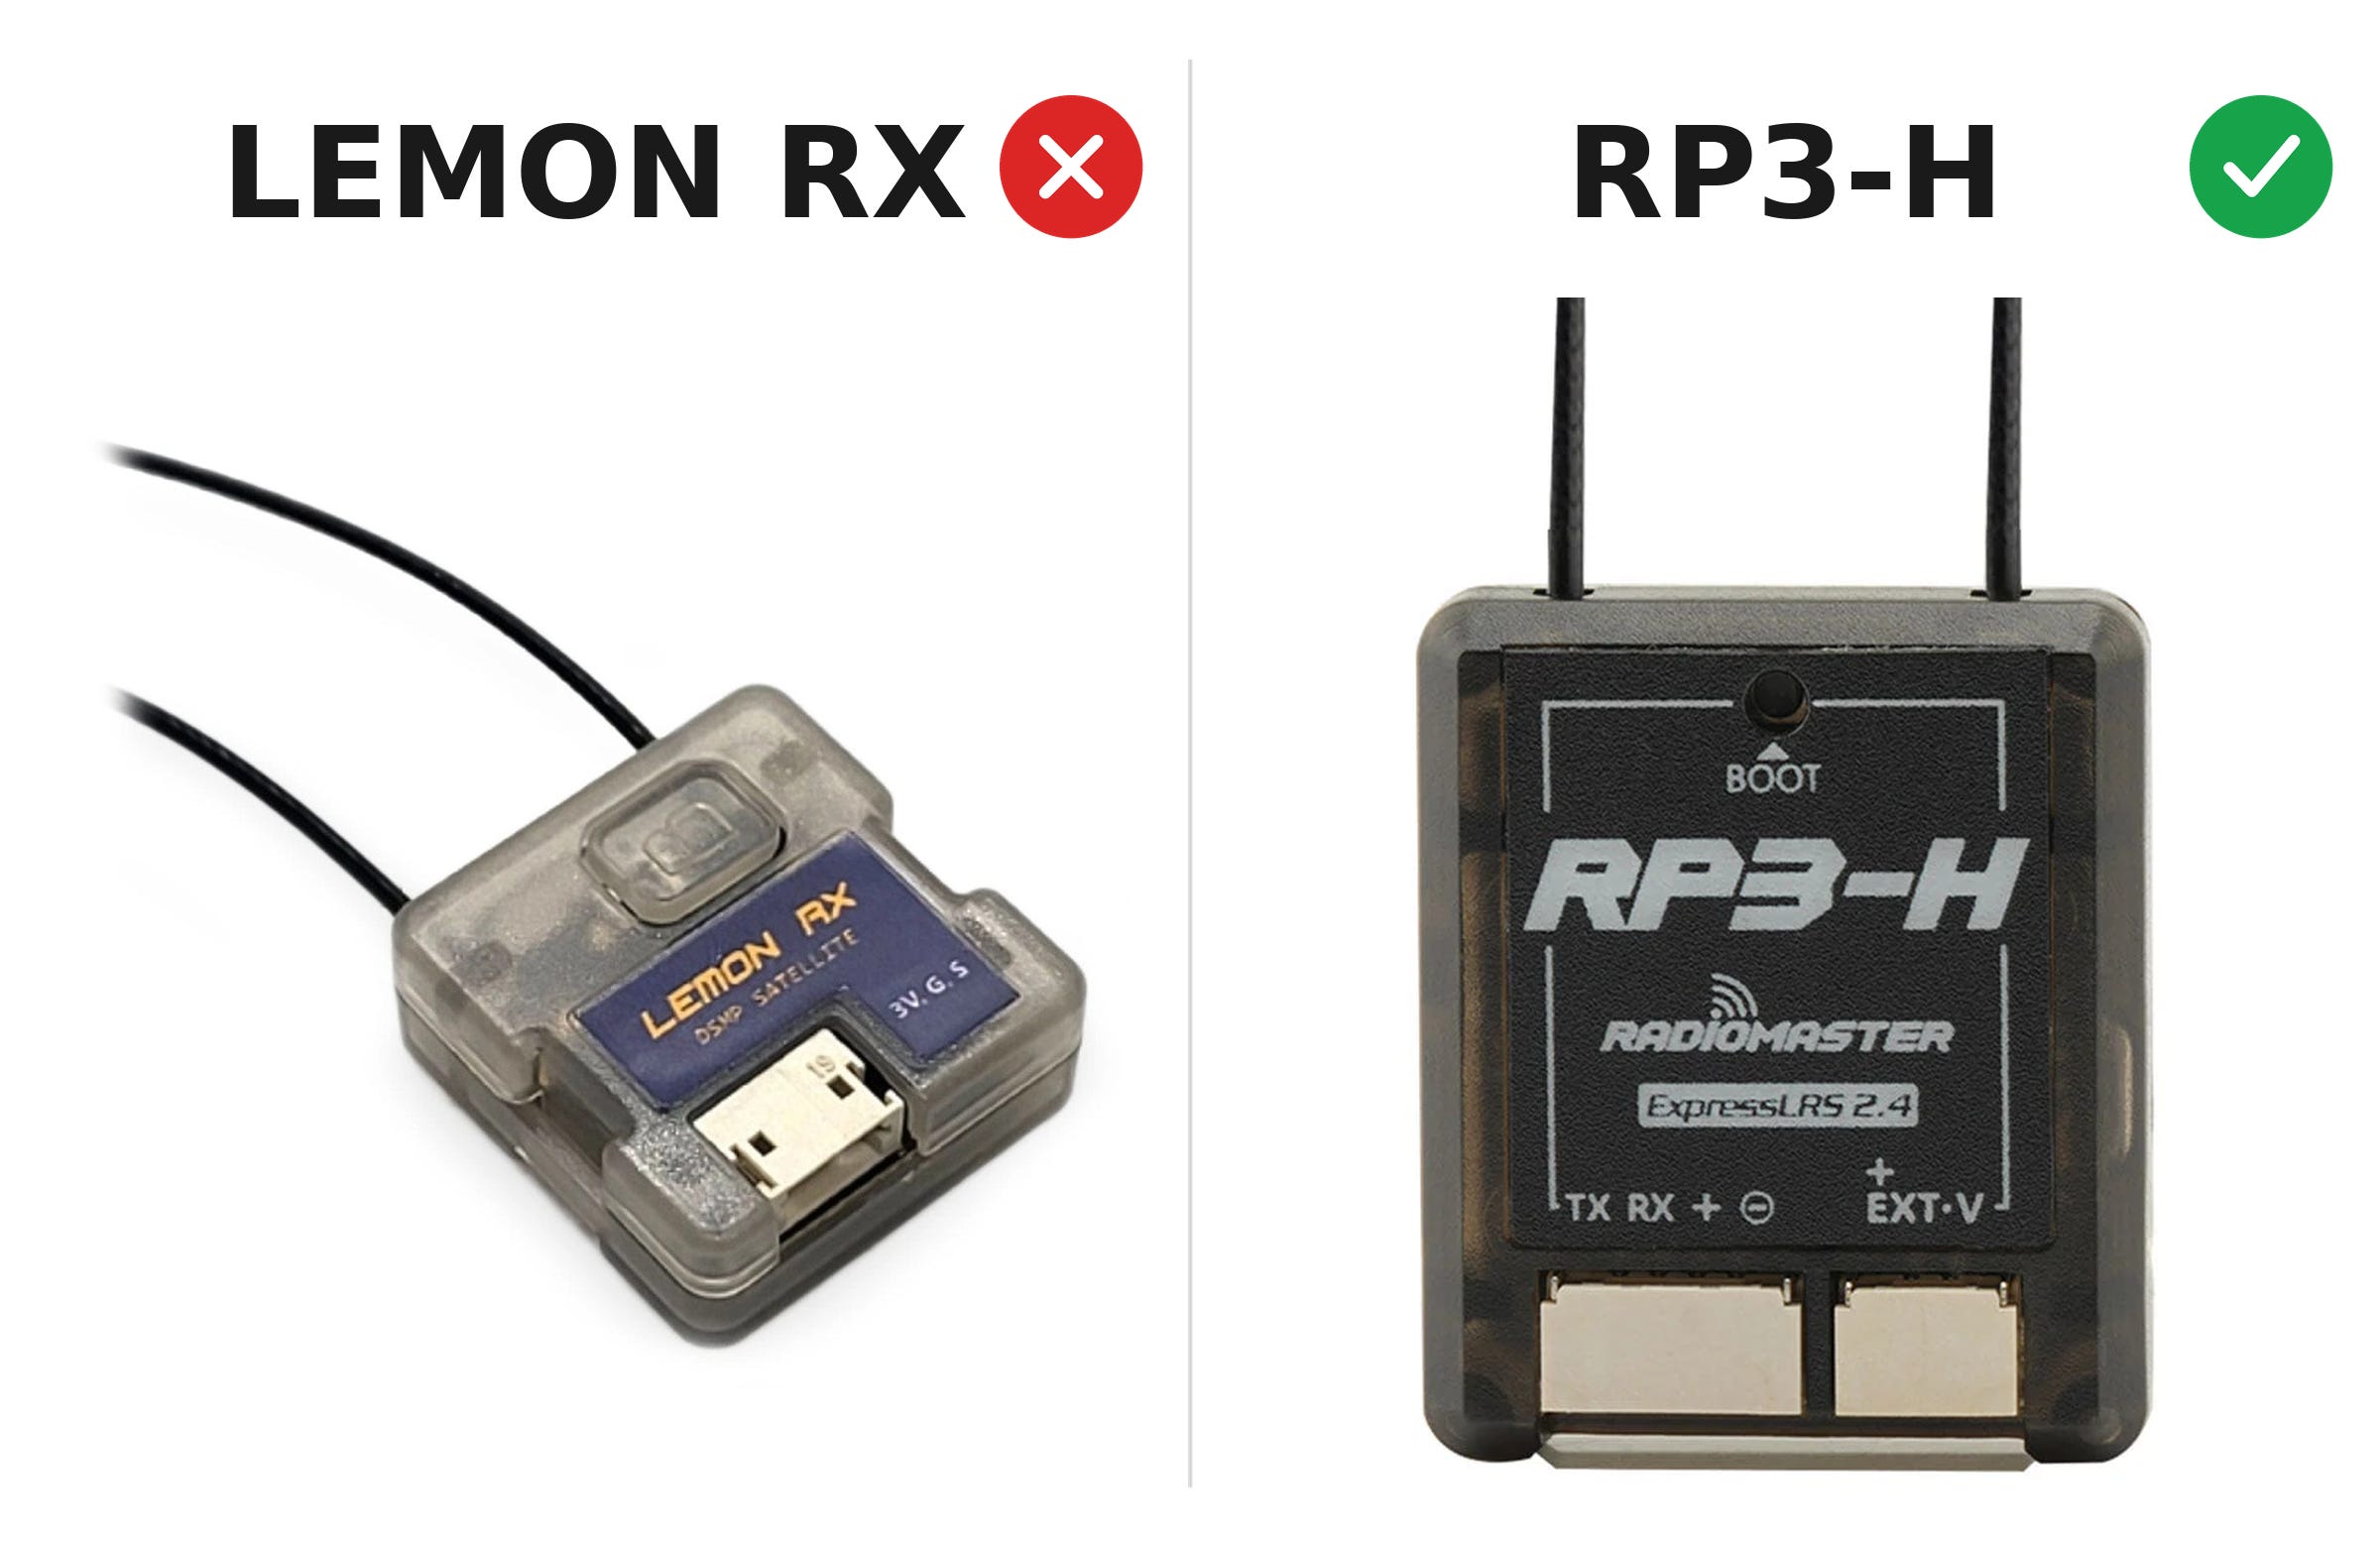
The next challenge came when setting up my radio system. My RadioMaster Boxer transmitter has built-in ExpressLRS support, but instead of buying an ELRS receiver, I had purchased a Lemon RX DSMX receiver. Although it technically worked, using an external DSMX module with a Pixhawk made the setup much more complicated than it needed to be.
Rather than continuing down that path, I switched to a RadioMaster RP3-H ExpressLRS receiver, which is designed for ELRS and includes a JST-GH connector compatible with Pixhawk systems.
4. The Receiver Cable Didn’t Fit
Unfortunately, installing the new receiver revealed another issue. The RP3-H uses a 4-pin JST-GH connector, while the Pixhawk receiver port uses a 5-pin JST-GH connector. The cable included with the receiver therefore couldn’t connect directly to the flight controller.
To work around this, I bought a JST-GH connector kit with spare housings and wires. Using a needle, I carefully removed each wire from the original 4-pin housing and transferred them into a new 5-pin housing in the correct order. After repinning the connector, I was finally able to connect the rec eiver to the Pixhawk.
5. A Test Flight Mistake
With everything finally assembled, I was ready for my first test flight. The flight itself went well, but I made one mistake that quickly became obvious afterward. I hadn’t secured the two thin receiver antennas, and during the flight one of them swung into a propeller and was cut.
Since a damaged receiver antenna can reduce range and lead to inconsistent signal quality, I replaced the receiver with another RP3-H and made sure to secure both antennas to the front arms of the drone before flying again.
Final Thoughts
Although each of these issues slowed down the build, solving them taught me much more about how the different components of a Pixhawk-based drone work together. Hopefully, documenting these problems and their solutions will save someone else building a similar drone some time and frustration.
If you want to see the full list of parts I used, along with the alternative components I considered before making each purchase, you can check out my other article here:
Building My Holybro X500 V2: Every Part — and the Alternatives I Considered
A breakdown of every component in my X500 V2 build: what each part actually does, and a look at the other options I considered for each one.
Great read! I'm also working on a Holybro PX4 X500 V2 with a Pixhawk 6C. Running into an ESC calibration issue — tried it through both Mission Planner and QGroundControl, but the calibration fails each time. Has anyone here run into this and found a fix? Would appreciate any pointers.